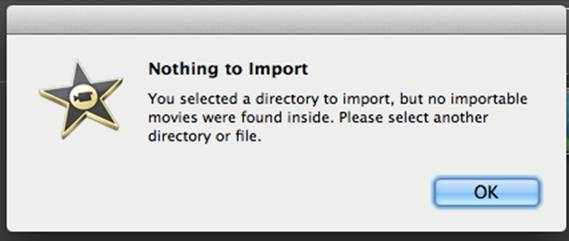
If you have any issue when importing 2014 World Cup GoPro Hero 3 MP4 recordings to iMovie/FCE, just follow this simple guide, which offers you a quick fix for the problems.
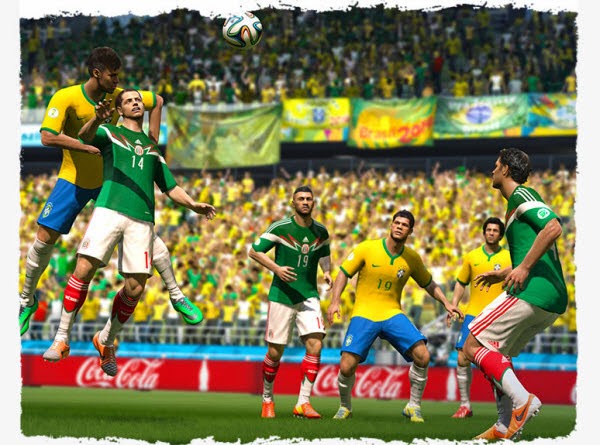
With everyone's expectations, the 2014 FIFA World Cup Brazil games have entered the countdown stage. But because of the time zone difference, you may miss your favorite team’s match. In such cases, you may choose your GoPro Hero 3 to record the game competition and edit in your iMovie or FCE as long as someone can help you do the editing workflow.
Because Mac (iMovie/FCE) does not seem to
like the videos that come right out of my GoPro Hero 3, you need to convert
World Cup mp4 videos from my Gopro Hero 3 to use these converted files in
iMovie/FCE. Keep reading a brief how-to on the simple process, which guaranteed
to edit your 2014 FIFA World Cup GoPro Hero 3 MP4 clips in iMovie/FCE smoothly.
To get the work done, a third-party software is needed. Here Pavtube iMedia Converter for Mac is highly recommended. It's a professional and powerful high-quality Mac video converter and editor. With it, you can effortlessly transcode World Cup GoPro Hero 3 HD MP4 files to AIC encoded MOV for iMovie/FCE.
Meanwhile, the Mac Video Conversion tool can create files compatible with various non-linear editing systems like Avid, iMovie, FCE, FCP, and Adobe Premiere (Pro) etc. Just download it and follow the tutorials below to transfer and import World Cup GoPro Hero 3 HD footage to for smoothly editing in iMovie/FCE.
Guide: Transcoding 2014 FIFA World Cup GoPro Hero 3 HD MP4 to AIC codec for Final Cut Pro
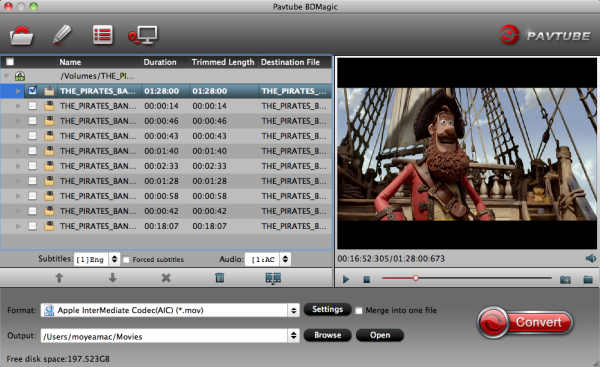
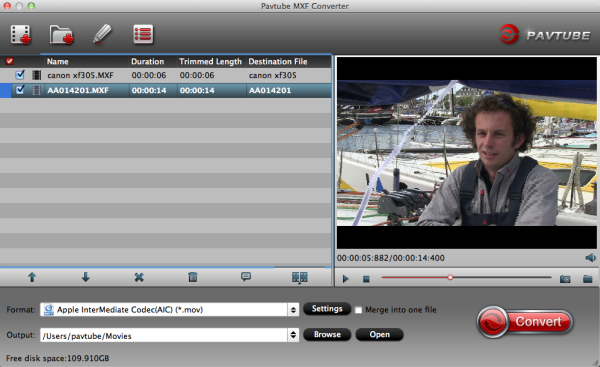
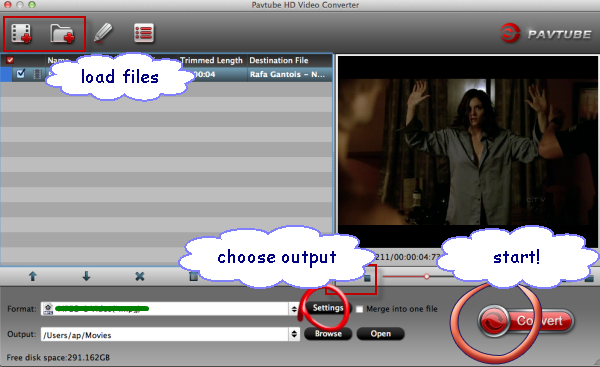
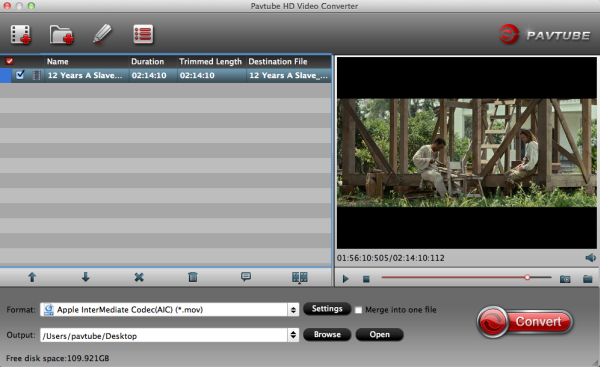
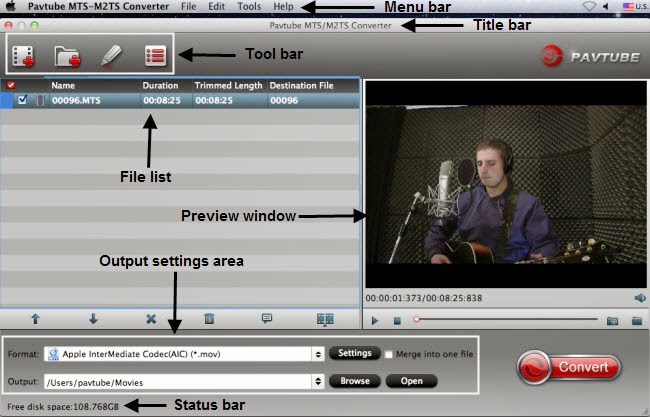
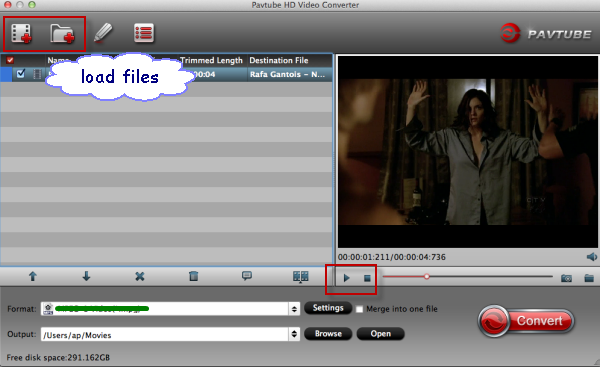
Step 1. Download, install and run the Mac MP4 to AIC Converter, click "Add Video" to load your World Cup GoPro Hero 3 mp4 footage.
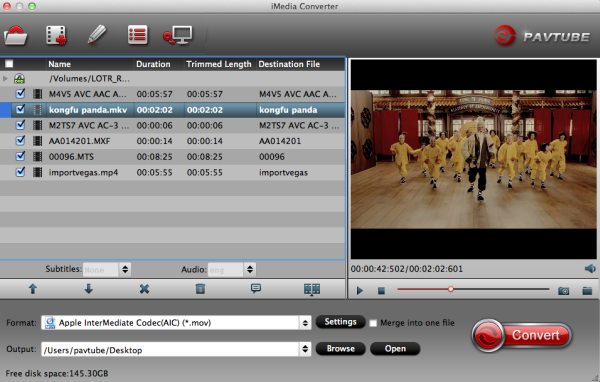
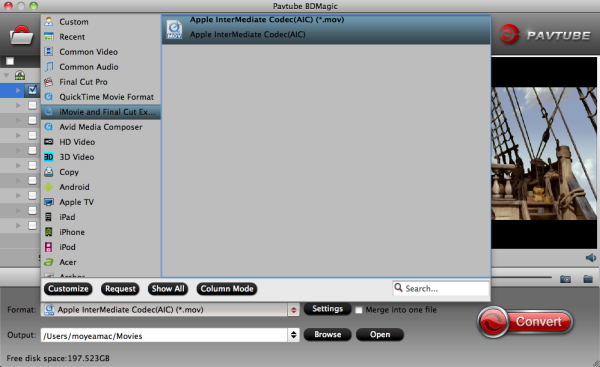
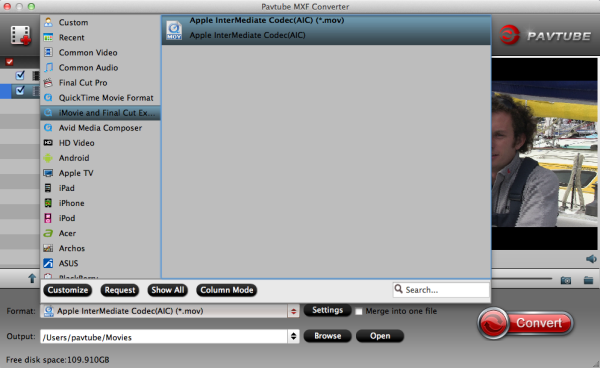
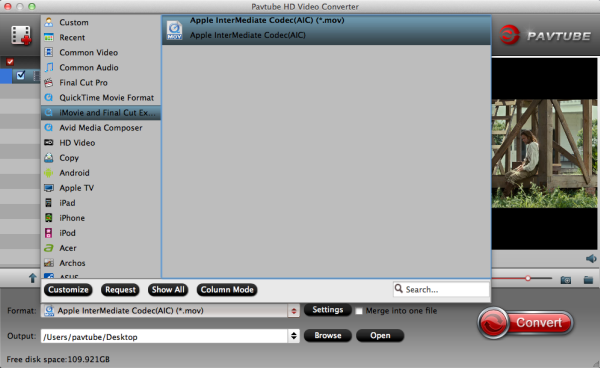
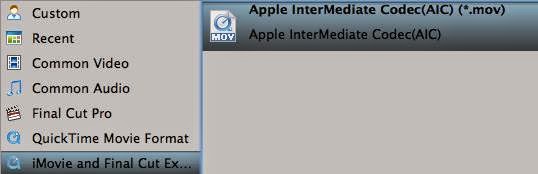
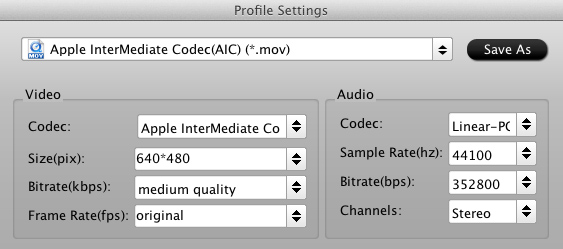
Step 2. Click the format bar, and move mouse cursor to ""iMovie and Final Cut Express > Apple InterMediate Codec(*.mov)" as output format.

Some more helpful features of the app:
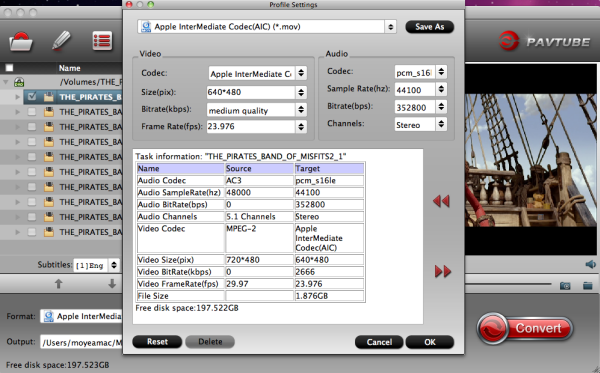
1. Settings- click to set video resolution(1920×1080/1440×1080/1280×720/720×480), bitrate(from 1Mbps to 20Mbps), frame rate (24p/30p)
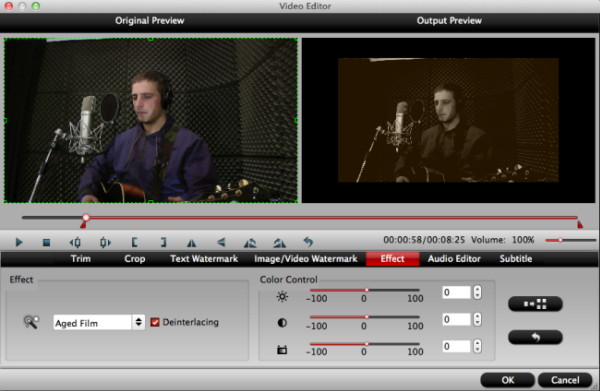
2. Editor (next to "Add" icon)- click to set deinterlace, denoise, mute, volume up, trim, crop, etc.
Step 3. Click "Convert" button to start World Cup GoPro Hero 3 MP4 to AIC MOV conversion.
As soon as the encoding process finished, you can get the final output .mov files via clicking "Open" button effortlessly. The transcoded files now are ready for editing in iMovie/FCE.
Additional Tips:
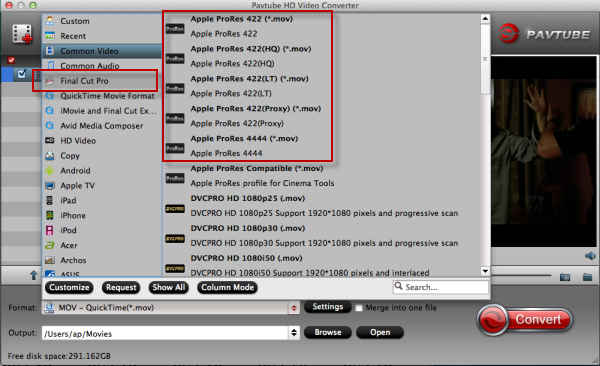
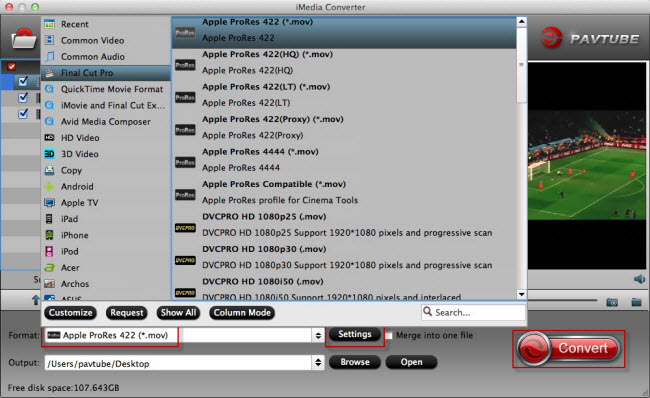
If you want to edit GoPro video in Final Cut Pro X or FCP 7/6, you just need to choose the "Final Cut Pro > Apple ProRes 422 (*.mov)" as output format in the second step; For Avid Media Composer, choose "Avid Media Composer > Avid DNxHD(*.mov)" as output; For Adobe Premiere Pro, choose Adobe Premiere/Sony Vegas> MPEG-2(*.mpg) as output.
Read More:
Best workaround for editing GoPro Hero 3 videos on PC/Mac
Converting 2014 FIFA World Cup Brazil video to MP4 and burning to DVD
Edit your GoPro Hero 3 footage in iMovie and share on Instagram with friends
With everyone's expectations, the 2014 FIFA World Cup Brazil games have entered the countdown stage. But because of the time zone difference, you may miss your favorite team’s match. In such cases, you may choose your GoPro Hero 3 to record the game competition and edit in your iMovie or FCE as long as someone can help you do the editing workflow.
To get the work done, a third-party software is needed. Here Pavtube iMedia Converter for Mac is highly recommended. It's a professional and powerful high-quality Mac video converter and editor. With it, you can effortlessly transcode World Cup GoPro Hero 3 HD MP4 files to AIC encoded MOV for iMovie/FCE.
Meanwhile, the Mac Video Conversion tool can create files compatible with various non-linear editing systems like Avid, iMovie, FCE, FCP, and Adobe Premiere (Pro) etc. Just download it and follow the tutorials below to transfer and import World Cup GoPro Hero 3 HD footage to for smoothly editing in iMovie/FCE.
Guide: Transcoding 2014 FIFA World Cup GoPro Hero 3 HD MP4 to AIC codec for Final Cut Pro
Step 1. Download, install and run the Mac MP4 to AIC Converter, click "Add Video" to load your World Cup GoPro Hero 3 mp4 footage.
Step 2. Click the format bar, and move mouse cursor to ""iMovie and Final Cut Express > Apple InterMediate Codec(*.mov)" as output format.
Some more helpful features of the app:
1. Settings- click to set video resolution(1920×1080/1440×1080/1280×720/720×480), bitrate(from 1Mbps to 20Mbps), frame rate (24p/30p)
2. Editor (next to "Add" icon)- click to set deinterlace, denoise, mute, volume up, trim, crop, etc.
Step 3. Click "Convert" button to start World Cup GoPro Hero 3 MP4 to AIC MOV conversion.
As soon as the encoding process finished, you can get the final output .mov files via clicking "Open" button effortlessly. The transcoded files now are ready for editing in iMovie/FCE.
Additional Tips:
If you want to edit GoPro video in Final Cut Pro X or FCP 7/6, you just need to choose the "Final Cut Pro > Apple ProRes 422 (*.mov)" as output format in the second step; For Avid Media Composer, choose "Avid Media Composer > Avid DNxHD(*.mov)" as output; For Adobe Premiere Pro, choose Adobe Premiere/Sony Vegas> MPEG-2(*.mpg) as output.
Read More:
Best workaround for editing GoPro Hero 3 videos on PC/Mac
Converting 2014 FIFA World Cup Brazil video to MP4 and burning to DVD
Edit your GoPro Hero 3 footage in iMovie and share on Instagram with friends